Last updated on May 26th, 2025 at 02:15 am
Native advertising is a concept so hot right now, that you need sunglasses in order to be cool enough to deal with it. All jokes aside, native advertising is where you want to spend those hard earned ad dollars in many different cases.
If you aren’t exactly familiar with native advertising, or would prefer reading a bit more about it before opening up your wallet, you’re in luck.
I’ll be using Outbrain for this example campaign, but the steps that we go through here shouldn’t be too difficult for those who wish to use Taboola for one reason or the other.
Alright, let’s go!
Getting Started
Now that you’ve familiarized yourself with native advertising and understand the basics of it, we can go right ahead and get started.
As I mentioned in the native advertising vs content marketing article, the industry is dominated by two major players: Taboola and Outbrain. The difference between the two is generally the quality of the content.
Taboola’s promoted content tends to be a lot more clickbait and unrelated than what Outbrain’s promoted content is.
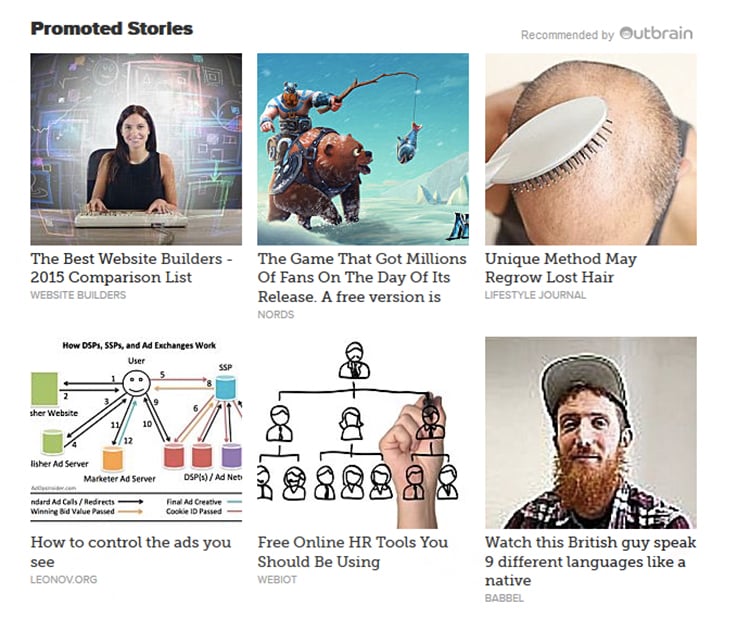
Here, let me show you:
Outbrain’s promoted content from Mashable.com
And here’s a look at the promoted videos Taboola shows on the front-page of Business Insider

‘Research reveals why women cheat, and it’s not what you think’
That might be pushing the boundaries of advertising for a website like Business Insider.
Moz recently conducted a case study comparing both Outbrain and Taboola against each other and reported on their findings.
Additional to their goal completions and tracking of conversions, Moz found great results with their social sharing on their blog posts too (another metric to keep in mind if you’re driving traffic to blog posts).
Step #1: Register for Outbrain
The first logical step to take is to register for the platform we’ll be using to run our native adverts, so head over to Outbrain. This is what you should see right now.
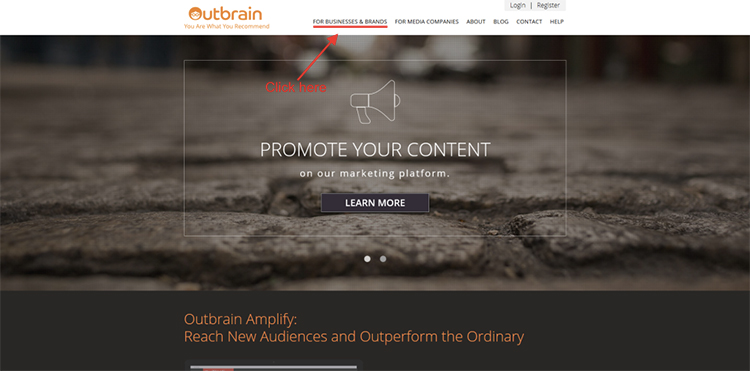
From the image you can see that we’re going to be using Outbrain in a similar fashion to how some of the largest brands and businesses in the world use it, so let’s click ‘For Businesses & Brands’ now to get started.
On this next page Outbrain explains to you exactly how, where and when your adverts will appear, and it’s an extremely exciting page to read in my opinion.
Just look at your possibilities, having your content shown on CNN’s website?
That’s quite impressive.
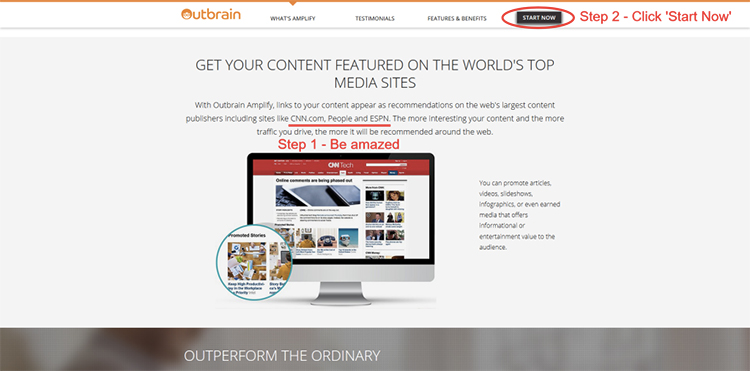
After you’re done with being amazed by your possibilities, click the start now button for the actual registration form to show up. This is what it looks like:

First you need to choose your country (A word of warning, Outbrain might not be available in all countries yet!), after which you’ll proceed to entering your email address and coming up with an excellent password.
Now all that’s left to do is click the ‘Create Account’ button and you’re in!
Step #2: Let’s Get Started With a Campaign
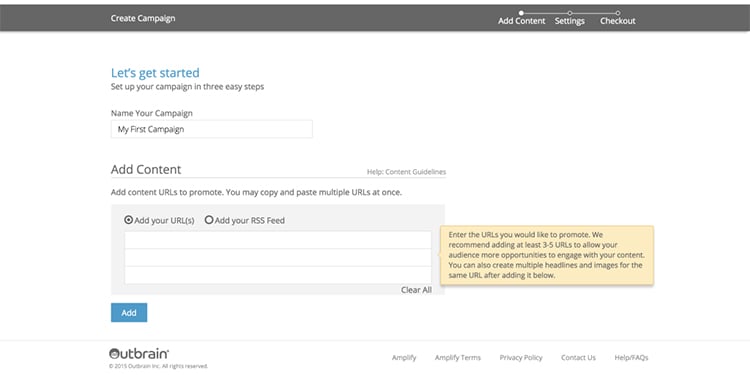
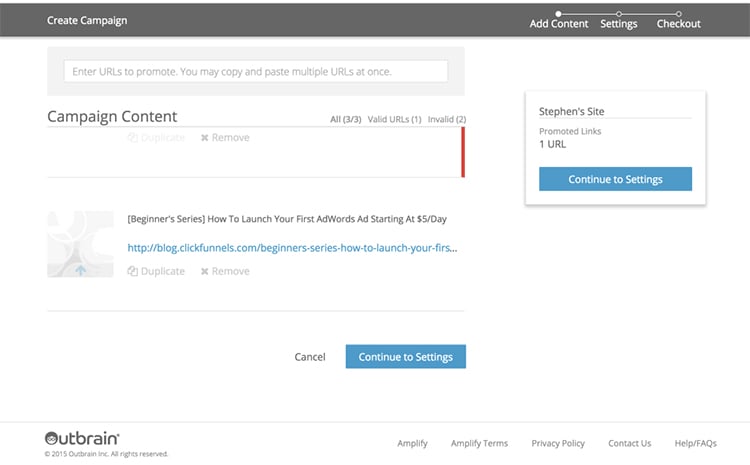
After you’ve registered for Outbrain you’ll be prompted to create your first ever campaign, how exciting! First you should name your campaign to make it distinguishable from your many yet to be created campaigns that I’m confident you’ll create after seeing the ROI and traffic from your first campaign.
Then you’ll need to enter the URLs you wish for Outbrain to amplify.
They recommend you to use between 3-5 articles as a minimum, and you can also create a variety of different headlines and images for a single URL after you’ve added it to the campaign.
A very clever and neat trick is to enter your RSS feed into the campaign, guaranteeing your latest posts getting promoted as they go live.
Maybe not suitable for those with a low daily budget, but definitely a cool trick for those with dozens of campaigns and hundreds of articles to promote.
A quick word of caution, if you include a URL which is not permitted by their network you’ll receive a red ‘error’ message and will be notified to change the landing page.
So be sure to read what types of content is ‘allowed’ to be advertised through their network.
Step #3: Check Everything
Before leaving the first step of the extremely simple 3-step Outbrain campaign creation process, check that you’ve edited the images and headlines for your chosen content, and remember to fix the invalid URLs if Outbrain gives you any of those in their notifications.
After you’re done with the headlines, images and URLs, move onto step 2 by clicking ‘Continue to Settings’.
Step #4: Have Your Campaigns Set Up Properly
This step is the most important one of them all.
If you mess up the targeting and budget of your campaign, you might be broke by Monday without any help from the wrong audience that Outbrain is advertising to.
So let’s make sure you do this right.
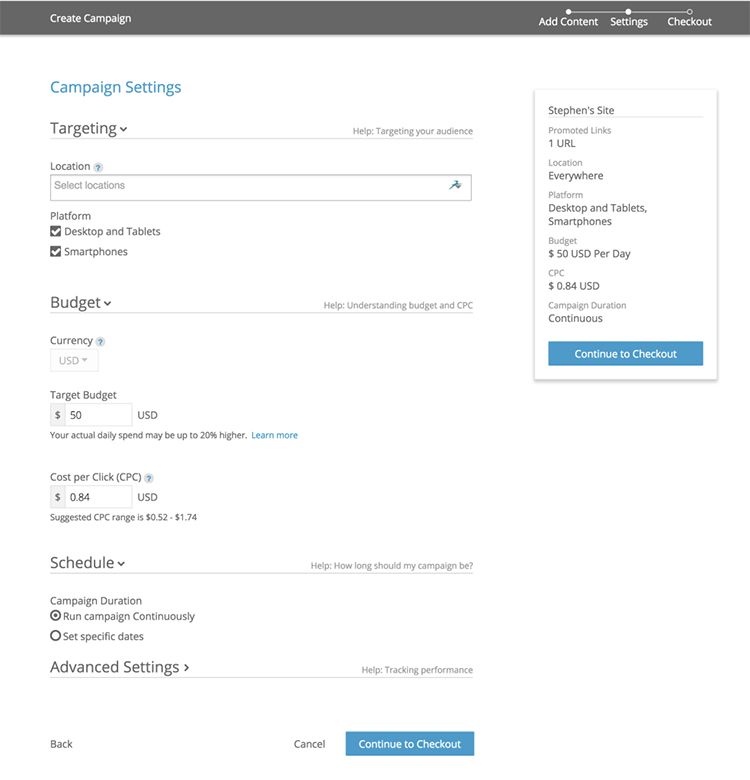
First you select the countries and regions you want to be targeting, for example USA and the UK.
You can also choose to leave this blank if you wish for your promoted content to be shown everywhere. I do not recommend leaving this blank, because the language barriers alone will render your content useless to many of those visitors that you’ll still have to pay for in any case.
Similarly to the tutorial on Facebook and Google advertising, you really want to dial in your audience and get specific.
You can also choose whether you want to focus on only larger screen visitors, mobile visitors or both.
After the targeting section you’ll need to set your budget for this campaign.
When setting the target budget you should keep in mind that, as Outbrain states, your actual spending might be up to 20% higher than the value entered here.
Native advertising is the most difficult campaign type to run on a shoestring budget, but it’s doable.
You’ll notice I’ve entered ‘$10’ per day in the step below. Outbrain has a minimum $10/day restriction.
Now I know this tutorial is $5 a day, but I figured we could make an exception just this once.
When you’re doing native advertising, it’s generally a platform which will work better on a higher budget but starting at a $10 budget is fine to learn the ropes of the platform.
Just be prepared for only few good leads coming in, as the CPC is rather high in such competitive form of advertising.
Finally set the CPC you wish to offer and the campaign schedule, which you can use to select specific dates the campaign runs on if you wish to do so.
The advanced settings section really is for those who need more advanced features
When you’re ready with your content and settings, just click the ‘Continue to checkout’ button to reach the final step: credit card information.
Step #5: The Favourite Step of Every Seller and Provider
Collecting your customers’ payment information.
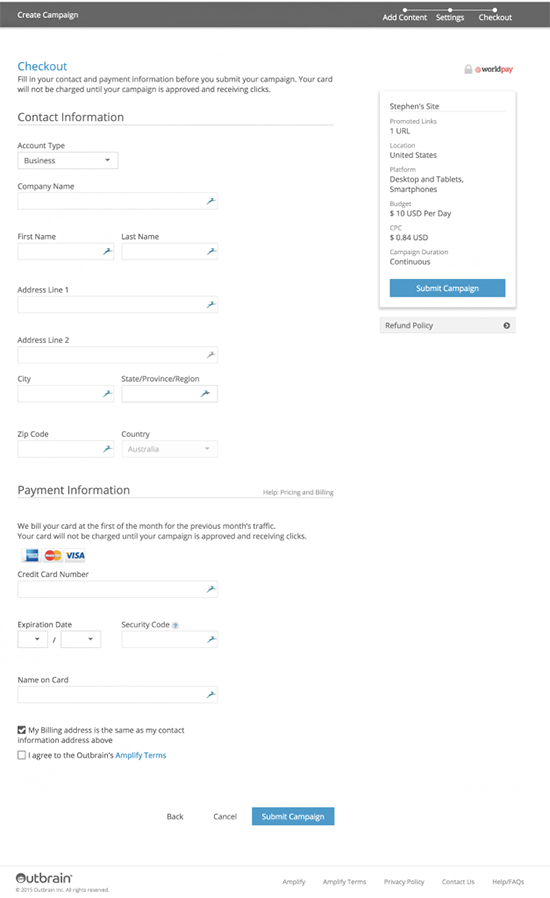
In this last step you pretty much only enter personal information about you and your credit card, so as far as those go, I won’t instruct you on what to type into the boxes.
Finally you’ll need to agree to Outbrain’s terms and that’s it, you’ve officially submitted your first campaign.
Congratulations!
Conclusion
While not the easiest advertising method to get right, nor the most affordable of the lot, native advertising is very effective and highly recommended for those who are willing to learn and adjust their campaigns day in day out.
The potential of this type of advertising is truly incredible, as you can get your content in front of people who read publications such as Mashable, CNN news or ESPN.
Marketing Land goes into detail regarding the benefits of native advertising and why you actually do need to consider it in your marketing efforts for your company.
If you’ve got any personal experience with native advertising and would like to share your own thoughts about it, please do so in the comments section below!
And as always, we love hearing about your results and achievements as a result of our guides here at ClickFunnels, so please share your thoughts and experiences in the comments section as well.